Because a thumbnail is the face of your video and it’s what reaches your viewer first, it will play a huge deciding factor in whether or not someone will watch your video.
You need to be sure that within a matter of seconds, your thumbnail accurately portrays what your video is about, has captivating visuals, is original and branded, and is easy to read and interpret. What you need is an efficient YouTube thumbnail maker.
As a fellow YouTuber, I want to go over all the do’s and don’ts of making a YouTube thumbnail. Get your notebooks out because I’m about to spill the tea on all the deets you need to know when creating your YouTube thumbnail.
Let’s get right into it.
YouTube video thumbnail maker
You know the importance of an awesome thumbnail, but you don’t have Photoshop, let alone the graphic design skills to work it. You need a tool that is going to offer you an amazing user experience that still delivers high-quality, professional looking thumbnails, that doesn’t drain your wallet completely.
I’ve got the product for you:
Bannersnack.
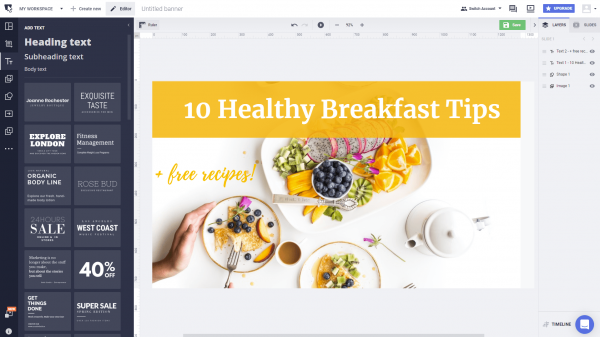
Bannersnack is an amazing design tool that you can use to create some bomb thumbnails. It’s super easy to use, and you can make professional looking and eye-catching thumbnails in literally no time, and without all the graphic design training and experience!
To name one of the many reasons you should use Bannersnack is that you can stack layers upon layers upon layers, which is exactly what you need for your thumbnail.
You need things to pop out at your viewer, which is why the layering option is so important.
Another great thing that is really important is that we have tons of elements and icons that you can use on your thumbnail. Use a relevant element on your thumbnail to make it more engaging and more animated-looking.
Bannersnack already has tons of templates for you to choose from for your thumbnail, this way you don’t have to spend another hour in the editing process. I know how it goes. I got you. Trust me on this one. It’s a true time-saver.
Sign up now to start making your awesome new thumbnail!
And like any good business, we have loads of tutorials on our YouTube channel if you ever need any tips on how to better use our thumbnail maker. We have tutorials on just about anything, so go ahead and check it out!
How to make a thumbnail for YouTube
I’m going to teach you how to make the. best. YouTube thumbnail in the game by using our YouTube thumbnail maker. You’re gonna be killin’ it. And you’re going to do it all in 5 easy steps. You ready? Let’s go.
Step 1. Use YouTube’s thumbnail size
The most important part of your entire design process is having the right size. You will see people’s thumbnails have their words cut off, half their picture missing, etc. It’s an actual disaster. So, don’t miss this part.
Official YouTube thumbnail size:
The official size of a YouTube thumbnail is 1280 pixels wide by 720 pixels tall, with the minimum width being 640 pixels. You can optimize all of your thumbnails by using this size, giving you a ratio of 16:9, which is absolutely ideal for your thumbnail.
You will never go wrong by using this size! So when you get on Bannersnack, just click on the “social media” tab, then click on “YouTube video thumbnail” option, and you’ll be on your way to making the best thumbnail ever.
Step 2. Choose a background image
Now it’s time for you to show your viewers a visual representation of what your video is really all about. Choose an image of your own, or a screenshot from your video, and upload it into your images on Bannersnack.
If you don’t have an image, don’t worry. We’ve got 2 million+ stock photos for you to use, and I guarantee you’ll find something that works for your video. Just search for whatever you’re looking for in the search bar, like “make-up” or “cooking” and you’ll find tons of high-quality, immersive pictures to choose from!
Step 3. Add text to describe your video
This step is important because aside from your image showing what the video has to offer, you can also describe your video by telling your viewers what it’s about. You can use a catchy phrase, or even just the title of the video itself.
People are much more inclined to read the text on your thumbnail than the text in the title of the video down below.
It’s important to note that the text on your video’s thumbnail will be small and difficult to read, so you have got to make sure that you have high contrast on the text and even boxes behind the text to make it stand out, and also just make the text big.
In this step, I normally choose 2 fonts. One for the official title, and one for the description of the video. It brings a nice flair to the thumbnail, and also a personal style. I use the same fonts for my videos for a season so people start to recognize my videos when they see them in recommended videos in the sidebar. You should do the same!
Choose a font preset from our collection of fonts that best works with your style and channel’s voice. I chose strong, yet fun. Which describes my channel perfectly. So choose something that works for you. We have something for everyone!
Font placement is everything. Place your text in the negative space of your photo, and if you don’t have negative space, create some. Place an element in the background, play with the color and opacity of it, then layer your text on top.
I have lots of tips on how to add text to photos that are great for learning some fun techniques to use on your thumbnail. And that’s not all! If you’re stuck on what fonts to use for your video, I’ve got a list of 60 cool fonts you could be using right now for your video. Check em out!
Step 4. Decorate your thumbnail
Adding text and elements to my thumbnail is kinda my favorite part. It’s where you really get to explore your creative side and see how catchy and fun you can make your art. You can add all sorts of things to your thumbnail.
Some personal style things I like to do for my thumbnail include adding a couple of emojis or some elements to my image to make it look more fun. So if I have a day in the life vlog, I might add a sun emoji or cooking emoji, depending on what I did in the vlog!
So decorate your thumbnail as you please, but don’t take away from the image or text. It’s a delicate balance of being minimalistic, yet fun, and not oversaturating your picture with so many things that the viewer feels overwhelmed and cluttered, therefore not click on your video. That’s no beuno.
Step 5. Download your work
Now it’s time to download your masterpiece.
We offer you the option to download your image as a PNG file, or a JPG. The choice is yours, although I personally prefer downloading my images as PNG, for quality reasons. Just make sure that your work remains under 2MB.
Click on the green “save” button in the top right corner, name and save your work to your workspace, then download. And you’re done!
Can you believe that it was actually that easy to create a thumbnail? Our YouTube thumbnail creator makes it so easy to make great designs, without the struggle of learning graphic design or anything else!
You still get all the benefits of professional designs without all the crazy hustle bustle.
So you’re all done! Time for you to upload your thumbnail to YouTube. If you already know how to do that, awesome! If not, follow my instructions down below.
How to upload your own custom thumbnail to YouTube
Now it’s time to upload your thumbnail.
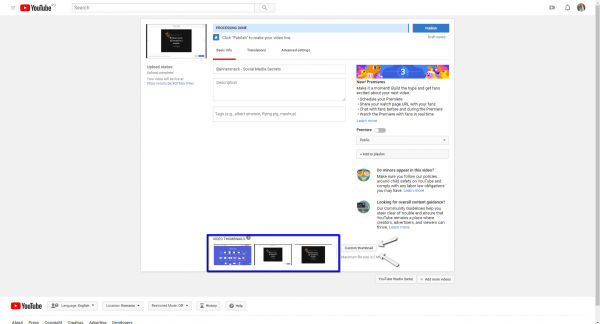
Once you’ve uploaded your video, you’ll see at the bottom of YouTube’s upload page that it will give you three auto-generated thumbnail, and an option to upload your own.
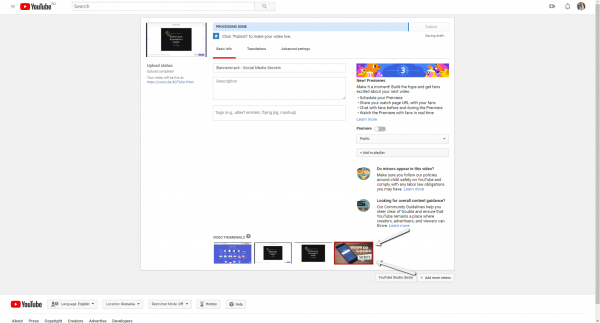
Click that “Customize thumbnail” button, upload your thumbnail, and it’ll look like this:
Make sure that your image is selected, and once it is, that will be your custom thumbnail. No need to choose one of YouTube’s auto-generated thumbnails. Use your awesome piece of art!
YouTube video thumbnail templates
If you don’t feel up to the task of creating your own thumbnail, or just don’t have the time, no need to fret. We’ve got you covered!
We have lots of templates for you to choose from, and I’ll directly link below some of my favorites. All of these templates were created by our professional designers so you’ll have the look and feel of a professional and your video thumbnail will be nothing short of awesomeness.
Yes, I know. It’s fantastic. You’re welcome!
I may have forgotten to mention the best part. All of these templates are 100% customizable, so you can make each and every one of them relevant to your video and it’ll still be original!
So pick the one you love most, and use that. All you need to do is click on the template you like and you’ll be sent to our editor. So what are you waiting for? Get to editing!
Definition of YouTube thumbnail
What is a YouTube thumbnail?
A YouTube thumbnail is the small display image on a video should summarize what your video is all about. It should have a background image, some text, and maybe even some emoji’s on it.
The goal of your thumbnail is to enclose all the awesomeness that your video has to offer and to have it boost the click rate on your video.
Is a YouTube Thumbnail important?
After you’ve spent hours upon hours editing that new vlog you just made, and thought of the perfect title, description, added all the little tags, and you’ve uploaded it to YouTube, you’re tired.
Your thumbnail might not even cross your mind. You think to yourself, “YouTube will give me an auto-generated thumbnail… It’s fine. My video is bomb, so I don’t need a custom thumbnail.”, right? WRONG.
You make not think it, but the display image plays just as an important role as the video itself. Hard to believe, but absolutely true.
Your YouTube thumbnail plays a huuuge deciding factor in whether or not a viewer will click on your video. If your thumbnail isn’t catchy, inspiring, are spark any type of interest, people will not watch it.
I can’t stress enough how important your thumbnail is. I know from personal experience, that when I put dedicated time and effort into my thumbnail, I will get twice the views.
Besides the fact that a YouTube thumbnail attracts people to your video, it also should create a sense of branding and personal style.
You should try to use the same or at least similar photo editing styles, fonts, colors, etc for your thumbnail so that people will begin to recognize your channel’s videos and so that you can create great brand awareness for your channel.
The do’s and don’ts of a YouTube thumbnail
Since we’re here, I thought I’d mention my list of do’s and don’ts for thumbnails. Here are some things for you to apply to your next thumbnails and so things you should swerve hard away from.
1. Do be enticing – Don’t make fake clickbait thumbnails
There is nothing worse than seeing a really enticing thumbnail that looks super cool, only to watch the video and not have what was promised to you delivered.
From personal experience, if I watch a clickbait type of video, but they don’t deliver, I’ll stop watching their content altogether. This is because I can’t trust their videos anymore, and am frustrated that I wasted my time.
However, the opposite is true as well. If someone has an awesome thumbnail and delivers what they promote, you best believe I’ll hit that subscribe button ASAP and then binge watch their content.
So please, YouTubers, no more fake clickbait. It’s a win-win for us all!
2. Do have a sleek, eye-catching thumbnail – don’t over do it
It’s good to have an original thumbnail for your video. I love to see people put effort into their thumbnails because it shows! But don’t overdo it. Don’t have so much on your thumbnail that I have no idea what’s going on and I just get overwhelmed.
A sleek and clean thumbnail is a happy thumbnail. Try to keep your emoji obsession to a minimum and also the amount of text you put on your thumbnail. Sometimes, less is more and I can say that this is definitely a situation where this applies!
3. Do make sure your text is readable – Don’t make it so small it can’t be read
Sometimes when you’re making your thumbnail, it looks like the text is pretty big. But it’s always good to do a trial run before publishing your video.
Sometimes the text is absolutely too small and it just looks like a blob of letters that can’t be made out.
Don’t make us get our grandma’s spectacle out to read your text!
After making a few thumbnails, you’ll be a pro at this.
4. Try to use your own images
This one is less of a “don’t” and more of a “do”. Because there is no “don’t” at all!
When you’re planning your next YouTube video, it’s a good idea to schedule in taking an image that would work perfectly for your video. I always take a specific shot for all of my videos to use for my thumbnail.
It’s nice and personal to see your YouTuber post a picture of their own that’s going to show the viewer exactly what’s about to go down.
In Bannersnack, you can always add your own images and you can even edit them in the editor! Bannersnack is just an awesome one-stop-shop kinda app!
Examples of great YouTube thumbnails
If you need some inspiration for what your feed and videos could look like, I picked out a few YouTubers whose thumbnails I really like. Enjoy!
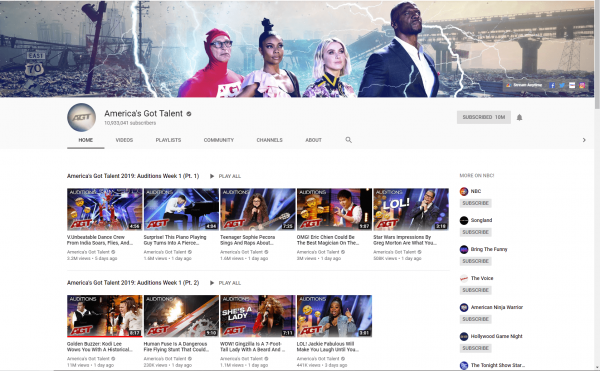
Source: America’s Got Talent
What we like about America’s Got Talent’s YouTube channel is that their thumbnails and simple and sleek. They add what type of video they are posting, ex: “Audition”, at the top left corner of their videos, and then they add their logo and that’s it. Simple branding for easy recognition.
Source: Renee Dominique
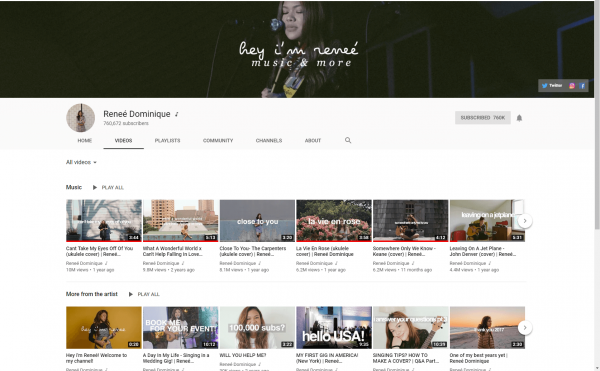
What we love about Renee’s channel is that she uses a font that is clear and easy to read. She’s always consistent with the font so that way people who like her music can easily find her videos in the recommended sidebar.
Source: Heleana’s Journey
Heleana’s Journey always uses a thumbnail background image that was taken the same day she filmed and then puts big, bold text on transparent boxes. The transparent boxes are always brightly colored so the text stands out and the viewers clearly know what her videos are about.
Source: itsFrida
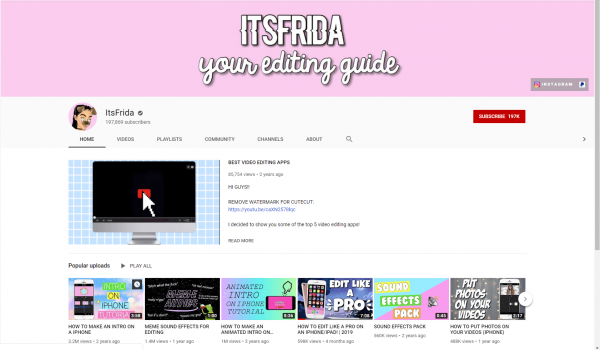
ItsFrida’s channel is fun and tech-savvy. The animated thumbnails give it a nice touch since she’s always teaching her viewers how to edit their videos better and spilling all the tea on technology tips and tricks. Although the thumbnails are not consistent in looks, they’re all colorful and captivating and easy to read.
In conclusion
Now that you know all the ins and outs of how to make a YouTube thumbnail, you’re bound to be a pro at it! Use Bannersnack for all your design needs. It’s easy to sign up and it’s free.
Also, you can check out our article with tips and tricks on how to make a YouTube banner.









David
June 27, 2020This is such a nice article. You have clearly mention all the points needed to create a beautiful Youtube Thumbnail. This is nice as I think we need to add images in an aspect ratio also. I am using Youtube Thumbnail Downloader(link in my profile) to get any video thumbnail for the reference.
Linda Fox
October 12, 2020Great article, Heleana Tiburca!
Thank you for sharing such a wonderful guide to create YouTube Thumbnails.
Nowadays, creating attractive & impressive YouTube Clickbait Thumbnails is necessary for driving more traffic to particular videos.